|
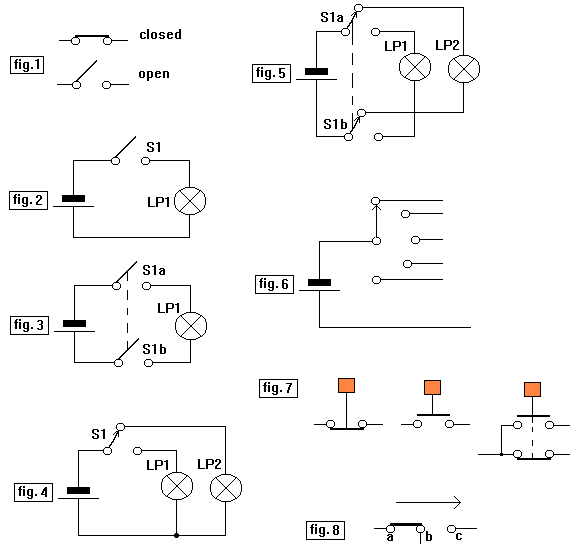 Fig. 1
Switches are used to
open/close a circuit.
Fig. 2
S1 is a "single pole
on/off" switch in the
off position.
Fig. 3
This is a "2 pole
on/off" switch which
completely isolates the
lamp from the supply in
the off position.
This may be important if
it is a high voltage
supply.
The dotted line
indicates that S1a and
S1b are part of the same
switch "ganged" together
and operate
simultaneously.
Fig. 4
This is a "single pole
changeover" switch.
Either lamp 1 or lamp 2
is on.
Fig. 5
This is a "2 pole
changeover" switch.
The unlit lamp is
completely isolated from
the supply.
Again S1a and S1b are
part of the same switch.
Fig. 6
This is a "single pole 5
way" switch.
It can select 1 of 5
circuits.
You can have 2p 5w, 3p
4w etc.
Fig. 7
This shows
(1) a "normally closed,
push to break".
(2) a "normally open,
push to make".
(3) both used together
to make a "changeover"
switch.
Fig. 8
This is a "changeover"
slide switch.
When operated a-b opens
and b-c closes.
Here are assorted switch
types. Panel-Toggle-Make
before
break-Pneumatic-Wafer-Proximity-Light
activated-Toggle-Rotary Reed-Pull-Locking-Vane-Interlocking-Rocker-Dimmer-Mercury-Tilt-Microswitch
Thumbwheel-Key-Wafer-Slide-Float-Optical-Foot-Thermal-Hall
effect |